
How do I replace the ceramic ignitor on my hybrid stove?
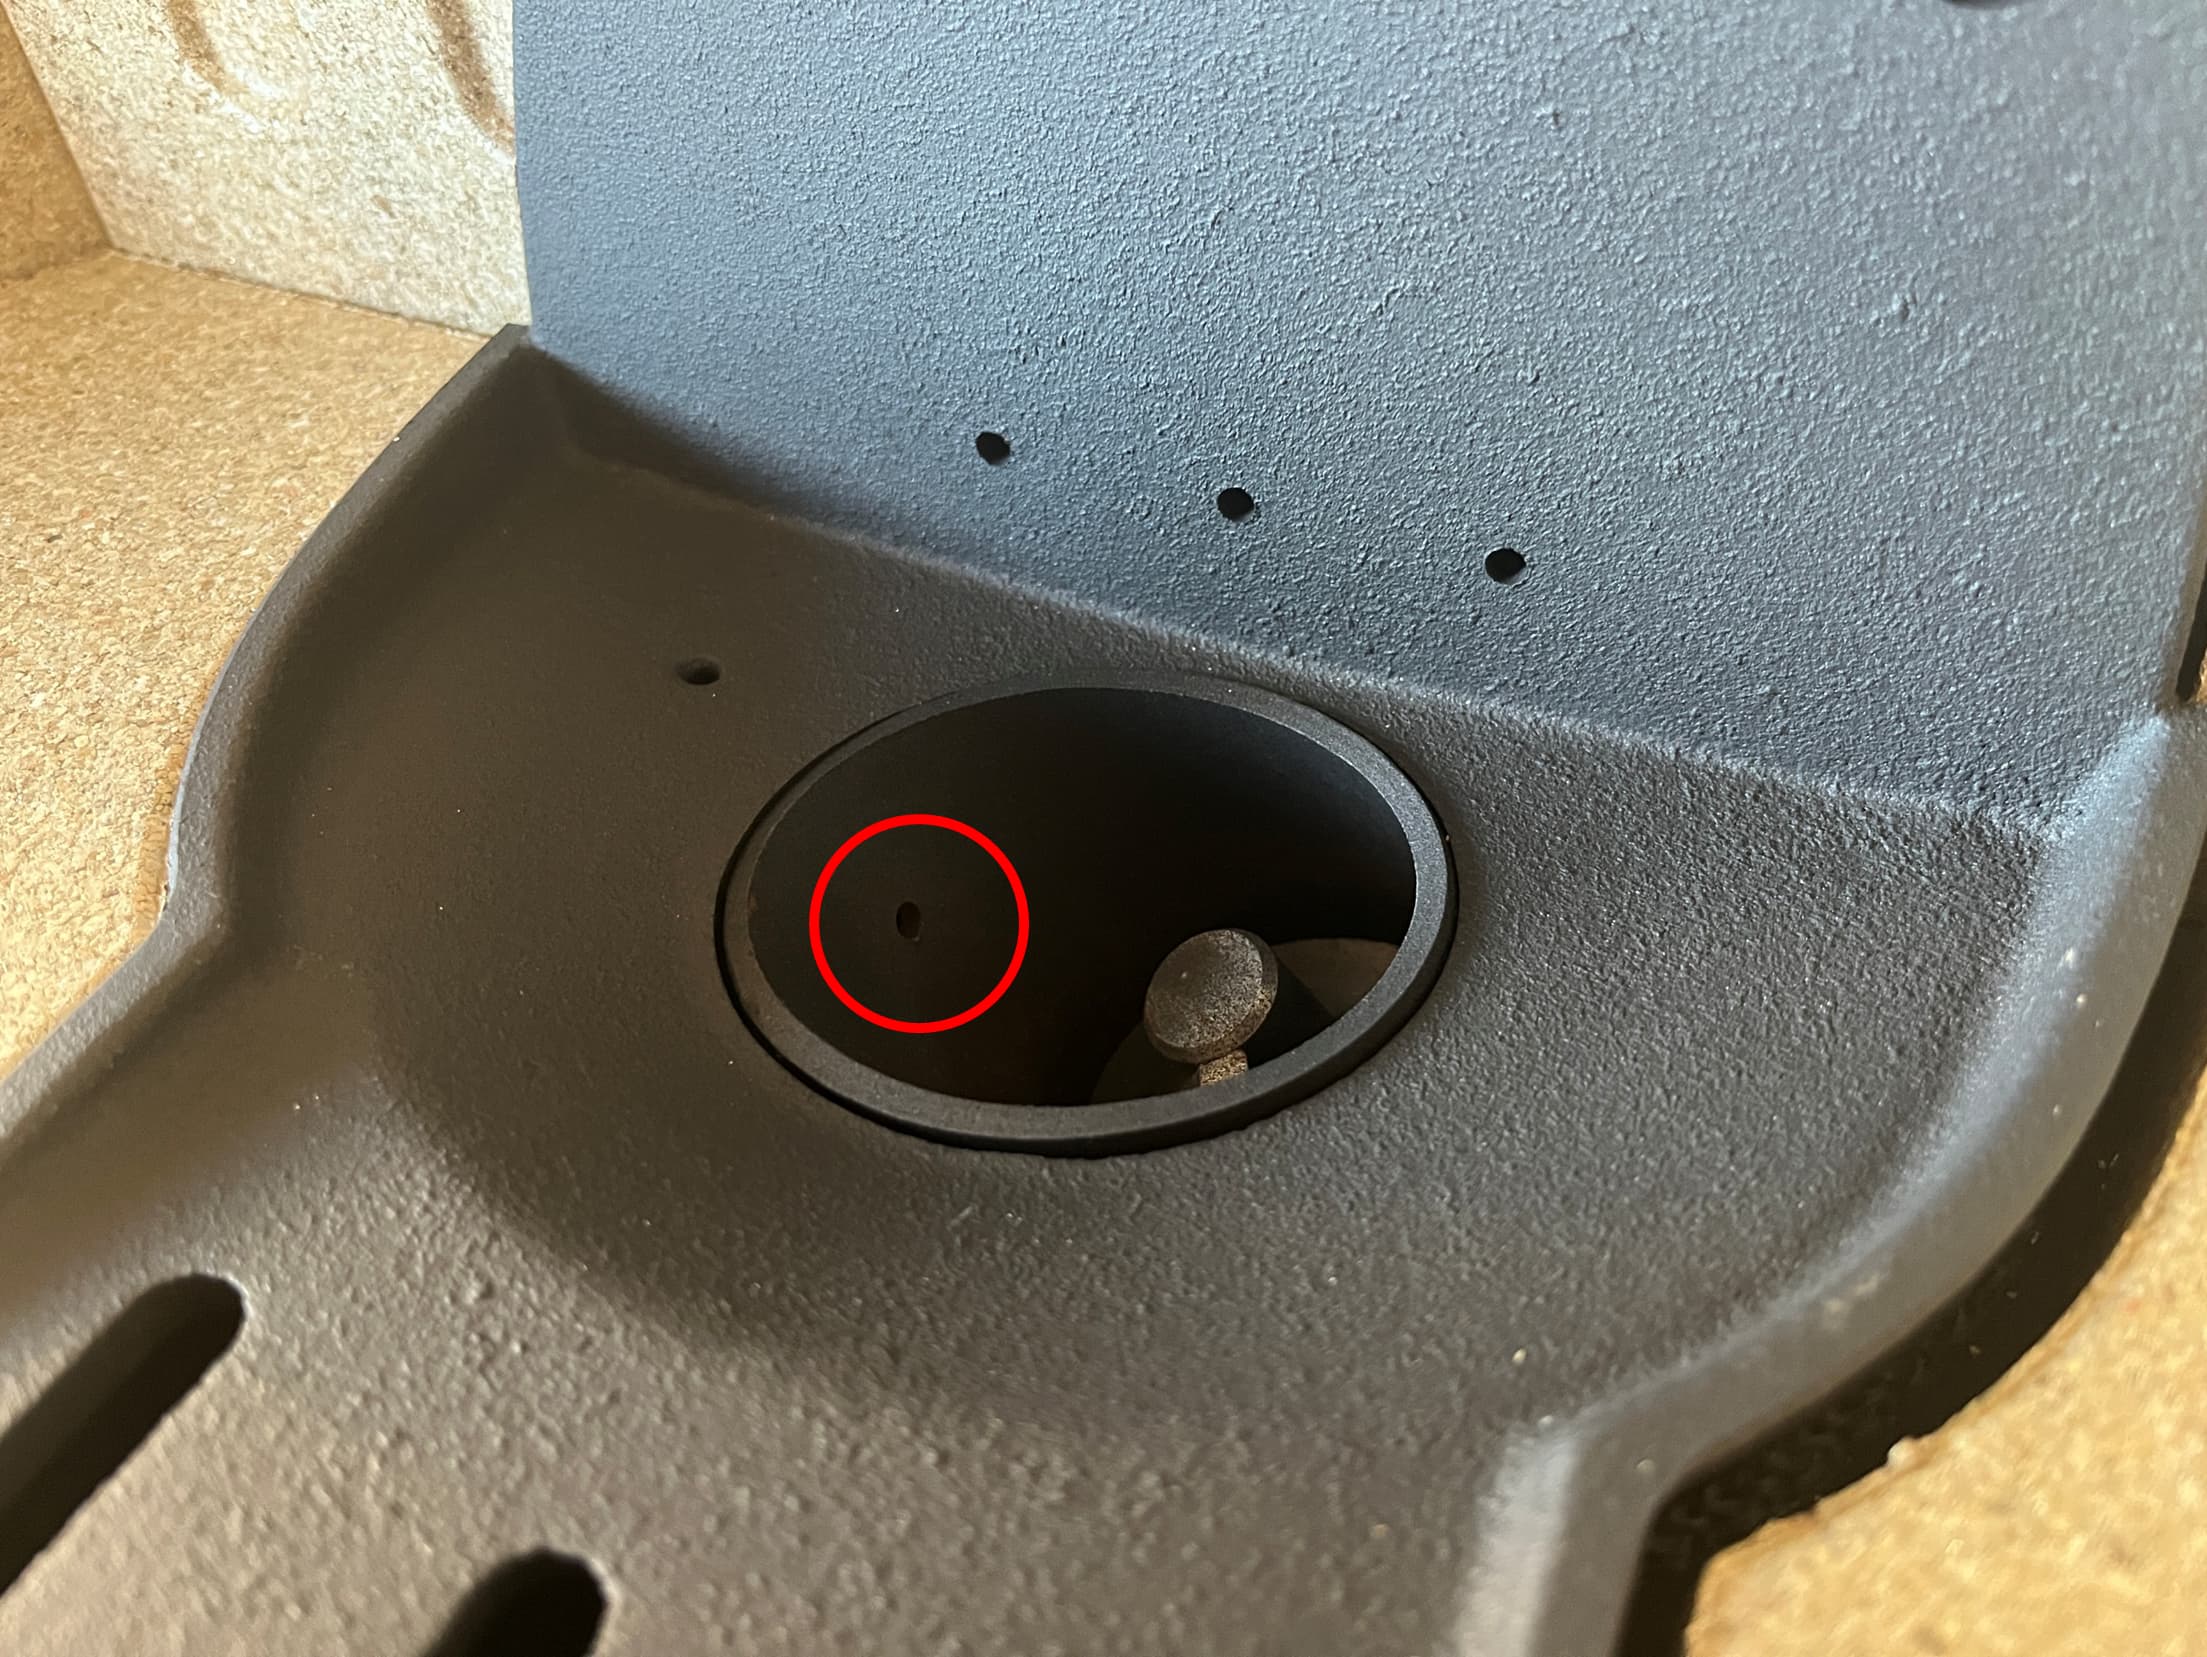
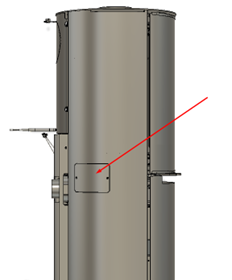
Image 1
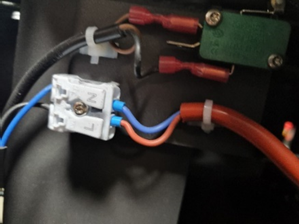
Image 2
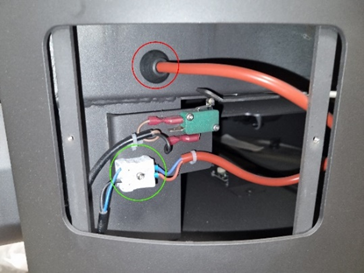
Image 3
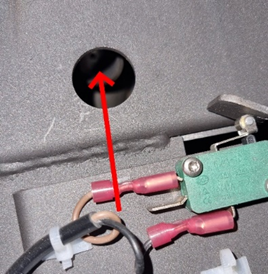
Image 4
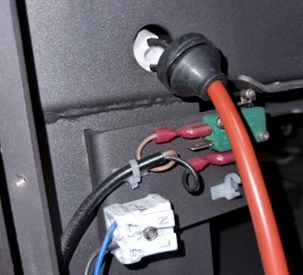
Image 5
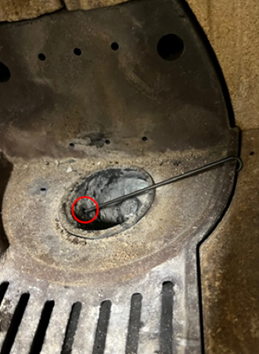
Image 6

Image 7
Read more
How do I resolve Alarm 2 – “Ignition failed”?
How do I solve problems with pellet accumulation on my hybrid stove?
How do I resolve Alarm 6 “No Pellets”?
How do I clean my Aduro hybrid stove?
What is the optimal flue gas temperature on my hybrid stove?
How do I shift between wood and pellets?
Why do I experience problems with the combustion?
Which type of pellets should I use?
Did you not find, what you were searching for?